
Mesh sling patio chairs and chaises are a stylish, comfortable addition to any outdoor space. Sling furniture is easy to move, simple to clean, and built to last — quality metal frames can hold up for over two decades with proper care.
However, even durable sling fabric has its limits. After years of sun exposure and regular use, mesh slings can become brittle, stretch out, or tear — while the frame itself remains perfectly intact. Before you consider tossing your patio set and losing your investment, know that there’s a better option: a DIY outdoor furniture repair solution that restores your chairs and chaises to like-new condition.
The Southern Company, a trusted leader in patio furniture repair, offers an easy, convenient mesh sling replacement kit designed for homeowners who want professional results without the professional price tag.
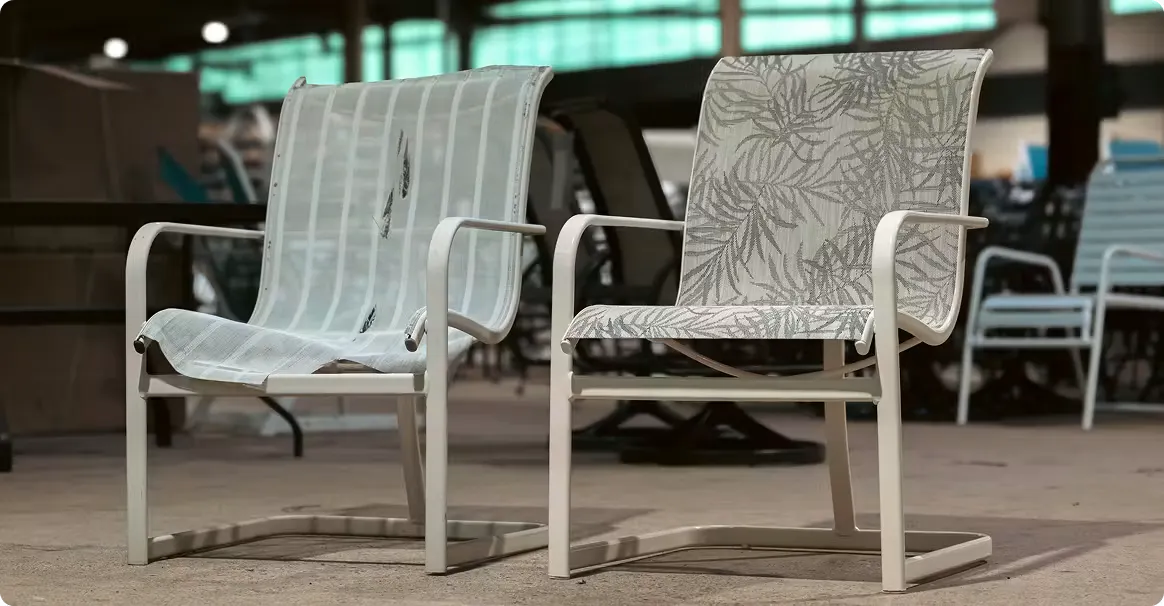
What’s Included in Our Outdoor Sling
Furniture Repair Kit

You don’t need to be a home repair expert to get great results. Our outdoor sling furniture repair kit includes everything you need:
- A double-stitched and double-hemmed custom replacement sling
- Gore Tenara premium thread — resistant to UV, rain, snow, salt, and cleaning chemicals
- 2 plastic sling rods (spines) for insertion into the left and right sling rails
- Easy-to-follow installation instructions with tool checklist
How to Order Your Mesh Sling
Replacement Kit
Getting started is straightforward. Before placing your order, you’ll need two things: your furniture measurements and your choice of fabric.
Important: Always measure the actual chair, chaise, or ottoman — never the old sling. Slings stretch over time and will not give you accurate dimensions. See the measuring instructions below for full guidance.
We also recommend sending a front and back photo of one of your chairs when placing your order. This gives us a clear picture of the style and shape beyond the measurements alone, and helps ensure the best possible fit.
Once you have your measurements, browse our full selection of replacement sling fabrics below — from solid colors to florals to contemporary patterns. If you’d like to see any fabrics in person before ordering, simply send us a list of fabric names (please list by name, not by number) along with your mailing address and we’ll send you up to five samples. Complete the measurement form and we’ll custom-cut your sling to fit.
How to Replace Patio Furniture Slings:
Step-by-Step
This DIY outdoor furniture repair project can be completed in an afternoon with basic tools. Follow these steps for a clean, professional installation.
-
Gather Your Tools
Before you begin, review the tool checklist included in your kit. You’ll also want to pick up a Spreading Tool (also sold as a Reversible Bar Clamp). It’s not included in the kit or strictly required, but it makes the installation significantly easier and is relatively inexpensive online. Search “reversible bar clamp” or “spreading tool,” and look for the heaviest-duty option you can find with a stretch capacity of at least 24 inches.
-
Remove the Old Sling
Using scissors or a box cutter, slice through the center of the damaged sling. Once cut, pull the sling material out from the left and right sling rails on the frame. The old sling should slide out with minimal resistance.
-
Insert the Sling Rods
Slide the two included plastic rods (splines) into the sewn channels on the left and right sides of your new replacement sling. These rods allow the sling to seat properly in the frame’s rails.
-
Feed the Sling Into the Frame
With the rods inserted, guide each side of the sling into the corresponding rail on the frame. Work carefully from one end to the other to ensure even alignment.
-
Pull the Sling Taut
This is the most important step. Pull the sling firmly to remove any slack before securing it in place. A properly tensioned sling will be more comfortable and will hold up significantly longer over time.
-
Inspect and Enjoy
Once installed, check the sling from all angles to confirm even tension and proper seating in the rails. Step back and take a look — your furniture should look brand new.
Questions? We’re Here to Help
If you run into any issues during your mesh sling replacement kit installation, don’t hesitate to reach out. Our team is available to walk you through every step of the process.
Before long, you’ll be back to enjoying your outdoor furniture — and your family might not even believe it’s the same set you’ve had for years.